
Renovate in the right order or pay twice
Why the boring work always comes first.
Every renovation horror story has the same plot: someone finished a room and then discovered the services behind it needed replacing.
A newly painted wall gets cut open for electrical wiring. An expensive kitchen has to be dismantled because a pipe is leaking. New hardwood flooring starts warping because nobody fixed the moisture problem underneath.
The problem is rarely the choice of paint, cabinets or flooring. It's that the work happened in the wrong order.
Renovating a house is not just a list of improvements. It's a sequence of jobs that depend on one another. Get the order right, and each job prepares the house for the next. Get it wrong, and you may end up paying twice for demolition, labor and materials.
This guide explains the right order for most substantial US home renovations, which jobs can overlap, and what you need to check before starting.
Tip: Before hiring contractors, write down everything you want to change, including improvements you might not be able to afford immediately. Planning future electrical, plumbing and layout changes now can prevent expensive rework later.
The sequence that saves money
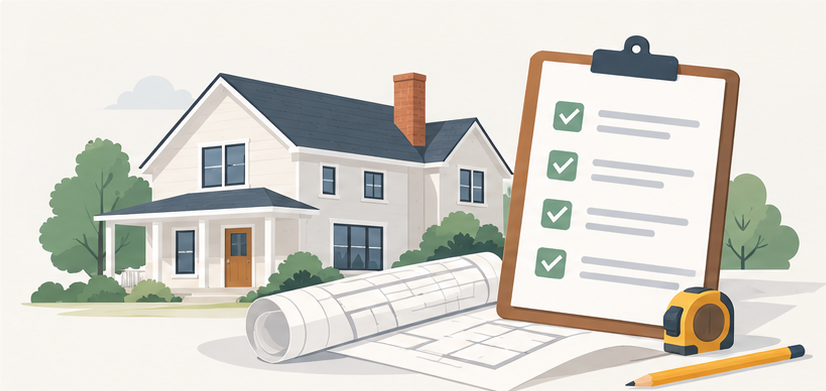
Structure and moisture problems first, then roofing and windows, electrical and plumbing, drywall, flooring, kitchens and bathrooms. Painting and decoration come last.
For a typical whole-house renovation, the practical order is:
Inspect the house and make a renovation plan.
Set the budget, check permits and hire contractors.
Fix structural problems and unsafe conditions.
Repair leaks, drainage and moisture problems.
Complete necessary roofing, window and exterior work.
Demolish unwanted interiors and prepare the layout.
Install rough electrical, plumbing and HVAC systems.
Complete insulation, air sealing and required inspections.
Hang, finish and prepare drywall.
Install cabinets, fixtures, trim and appropriate flooring.
Paint, decorate and finish the remaining details.
Complete final inspections and correct any outstanding problems.
This is a guide, not a rigid rule. Some jobs overlap, and the exact order depends on the age of the house, the scope of the renovation and local building requirements.
The principle is simple: fix what is hidden before paying for what is visible.
1. Inspect the house before spending money
A renovation budget based only on what you can see is usually missing something.
Before ordering kitchen cabinets or hiring a painter, find out what condition the house is actually in.
Start with the major systems:
Foundation and structure. Look for significant cracks, sagging floors, damaged framing and signs of movement.
Roof. Check for missing shingles, damaged flashing, leaks and deteriorating roof decking.
Water and drainage. Investigate stains, moisture in the basement or crawl space, blocked gutters and water collecting near the foundation.
Electrical system. Check the condition of the electrical panel, wiring, outlets and available electrical capacity.
Plumbing. Look for leaks, corrosion, poor water pressure and aging supply or drain pipes.
Heating and cooling. Check the furnace, air conditioner, heat pump, ductwork and ventilation systems.
Some problems are obvious. Others require a licensed home inspector, structural engineer, electrician, plumber or HVAC contractor.
Pay particular attention to older homes. Houses built before 1978 may contain lead-based paint, and some older building materials may contain asbestos.
The Environmental Protection Agency recommends using lead-safe certified contractors for renovation work that disturbs painted surfaces in pre-1978 homes. Suspected asbestos-containing materials that will be disturbed should be evaluated by qualified professionals.
A proper inspection helps you separate essential repairs from optional improvements.
Tip: Photograph the condition of each room before demolition starts. The photos may help with contractor discussions, insurance questions and future repairs.
2. Set the budget and check permit requirements
Once you understand the property's condition, decide how much you can realistically spend.
Divide the renovation into three categories:
Essential repairs: Foundation problems, active leaks, unsafe wiring, damaged plumbing and other safety issues.
Functional improvements: Better insulation, HVAC upgrades, improved layouts, additional outlets and storage.
Cosmetic improvements: Paint, flooring finishes, decorative lighting, countertops and cabinet hardware.
Essential repairs come first. A beautiful kitchen won't stay beautiful if water is entering through the ceiling.
Keep money aside for surprises
For a substantial renovation, setting aside approximately 10 to 20 percent of the planned budget for unexpected costs is a useful starting point.
Older homes, especially those with unknown electrical, plumbing or structural conditions, may need a larger reserve.
A $50,000 renovation with a 15 percent contingency means keeping another $7,500 available rather than assuming the entire project will cost exactly $50,000.
Don't spend that reserve on upgraded countertops before the hidden work is finished.
Find out which permits you need
Building permits in the United States are generally handled by local city or county building departments.
Requirements vary, but permits are commonly needed for work such as:
Structural changes or removing load-bearing walls.
Major electrical or plumbing alterations.
HVAC installation or significant modifications.
Room additions and certain layout changes.
Some roofing, window and exterior projects.
Simple cosmetic work, such as painting or replacing certain finishes, often doesn't require a permit.
Ask your local building department before work begins. If a contractor is obtaining the permits, confirm whose name appears on them and who is responsible for scheduling inspections.
Unpermitted work can create problems when selling the house, making an insurance claim or completing future renovations.
3. Hire contractors before planning the detailed schedule
A good renovation depends on coordination, not just finding the cheapest contractor.
For a large project involving several trades, a general contractor can organize the work, manage subcontractors and help coordinate inspections.
For smaller projects, you may be able to hire individual trades directly.
Before signing a contract:
Get at least three written estimates where practical.
Verify any licenses required by your state or locality.
Ask for proof of liability insurance and workers' compensation coverage where applicable.
Check references and examples of similar projects.
Confirm who will obtain permits and arrange inspections.
Agree on materials, responsibilities, payment milestones and estimated dates.
Put any changes to the original scope in writing.
A significantly cheaper estimate may exclude demolition, disposal, permits, materials or finishing work.
Compare the complete scope, not just the final price.
The Federal Trade Commission advises consumers to check licensing and insurance, obtain written estimates and avoid paying the entire project cost upfront.
Tip: Ask contractors what must be completed before they can start. An electrician may need walls opened, while a drywall contractor needs the rough electrical and plumbing inspections completed first.
4. Fix structural problems before changing the layout
Structural repairs belong near the beginning because everything else depends on the building being safe.
If you're removing a wall, widening an opening, adding a room or changing floor supports, determine the structural requirements before interior finishing begins.
The work might include:
Repairing damaged floor joists or wall framing.
Reinforcing beams and supports.
Correcting serious foundation problems.
Replacing deteriorated structural materials.
Installing properly designed supports for new openings.
Not every crack indicates structural failure. However, covering significant cracks with new drywall doesn't solve the underlying problem.
A structural engineer can determine whether a wall is load-bearing and specify the necessary support.
Permits and inspections are often required for structural alterations.
Never remove a wall simply because it looks non-load-bearing. Its actual function must be established first.
5. Stop water and moisture problems before finishing anything
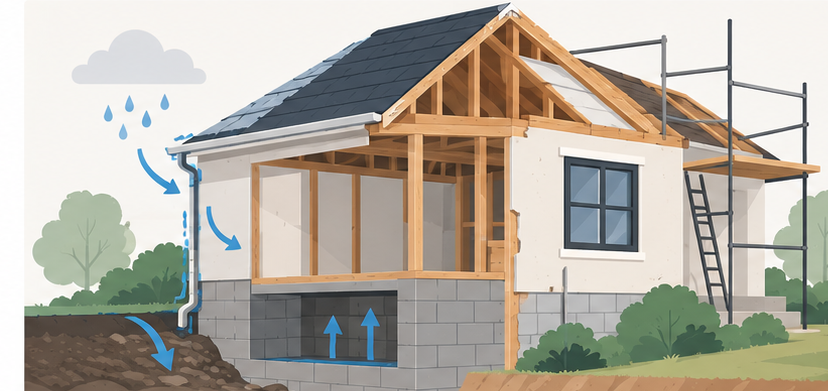
Water is one of the most expensive problems to ignore during a renovation.
A roof leak can destroy new drywall and insulation. Basement moisture can damage flooring. A slow plumbing leak can ruin cabinets before the kitchen is finished.
Start by identifying the source.
Check:
Roof shingles, flashing and penetrations.
Gutters and downspouts.
Grading and drainage around the foundation.
Basement and crawl-space moisture.
Window and door flashing.
Supply pipes, drains and plumbing connections.
Bathroom and kitchen ventilation.
Different moisture problems require different repairs.
A basement wall that becomes wet after heavy rain may need drainage improvements. Condensation on cold surfaces may require better ventilation, insulation or air sealing. A stained ceiling may indicate a plumbing or roof leak.
Painting over stains or applying a waterproof coating without identifying the cause can hide the problem while damage continues.
Fix the source and allow affected materials to dry before covering them.
For homes with significant mold growth, sewage contamination or extensive water damage, professional assessment may be necessary.
6. Repair the roof, windows and exterior envelope
Once structural and moisture problems are understood, deal with the building's exterior protection.
This may include roofing repairs, flashing, siding, gutters, exterior doors or window replacement.
The goal is to make the house reliably weather-resistant before expensive interior finishes are installed.
You don't automatically need a new roof or new windows. Sound components can often be repaired.
If replacement is already planned, completing it before surrounding interior drywall and trim is finished can prevent rework.
Think about energy efficiency now
Renovation is also an opportunity to improve insulation, air sealing and ventilation.
The US Department of Energy recommends considering the house as a whole system rather than treating every upgrade separately.
Air sealing can reduce drafts and energy waste, but a tighter home still needs adequate ventilation.
If you plan to replace the heating or cooling system, discuss insulation and air-sealing improvements before sizing the new equipment.
An improved building envelope may reduce the heating and cooling capacity required.
7. Demolish the old interiors safely
Once the plans and necessary approvals are in place, remove the materials and fixtures that won't be staying.
This might include outdated cabinets, damaged drywall, old flooring, unwanted partitions or obsolete bathroom fixtures.
The purpose is to create access for structural repairs and new utilities.
But demolition isn't simply smashing everything out of the way.
Walls can conceal electrical wiring, plumbing, gas lines and HVAC ducts.
Older materials may contain lead or asbestos.
Take extra care in pre-1978 homes
The EPA's Renovation, Repair and Painting rule generally requires covered paid contractors disturbing painted surfaces in pre-1978 housing to be lead-safe certified and follow specified work practices, subject to exemptions.
Owner-occupants working on their own homes generally aren't covered in the same way, but lead exposure remains dangerous.
Before disturbing suspicious older materials, investigate the risks and use appropriately qualified professionals.
Don't sand, cut or demolish material suspected of containing asbestos without proper evaluation.
Protect areas that won't be renovated, control dust and arrange waste disposal before demolition begins.
8. Complete rough electrical, plumbing and HVAC work
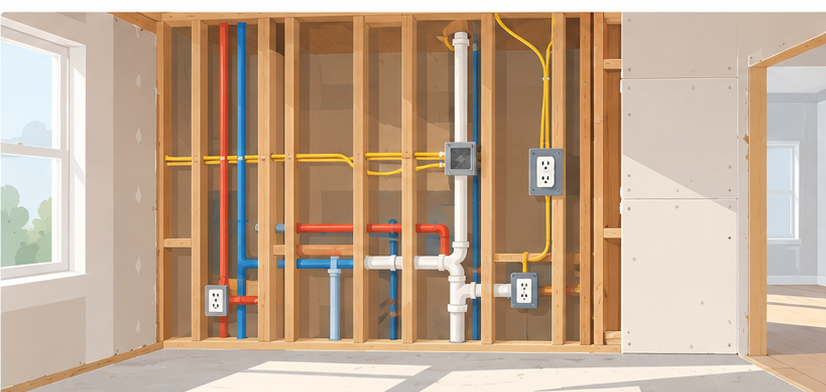
This is one of the most important stages.
Rough-in work is the installation of electrical wiring, plumbing pipes, ductwork and other systems before the walls and ceilings are closed.
It is much cheaper to change these systems now than after drywall, tile or cabinets are installed.
Electrical rough-in
Decide where you need outlets, switches, ceiling lights, appliances and internet connections.
Think about the final furniture layout.
A home office may need additional outlets and network connections. A kitchen may require new dedicated circuits. Bathrooms, kitchens and other locations may have specific electrical protection requirements.
A qualified electrician can assess the existing panel, circuit capacity and applicable code requirements.
Plumbing rough-in
Plan the final positions of sinks, toilets, showers, washing machines and appliances.
Moving a kitchen sink after installing countertops can mean reopening cabinets and walls.
Consider whether old supply or drain pipes should be replaced while they're accessible.
HVAC rough-in
Plan ducts, refrigerant lines, vents, exhaust fans and other heating or cooling connections.
Changes to room layouts may affect airflow and equipment requirements.
Coordinate the trades so that pipes, wiring and ducts don't interfere with one another or weaken framing.
Schedule rough-in inspections
Where permits require it, the building department will inspect work before it's concealed.
Do not close walls until the necessary rough electrical, plumbing, mechanical and framing inspections have been approved.
Tip: Take photographs of all wiring, pipes and ducts before drywall goes up. They can help you avoid drilling into hidden services years later.
9. Insulate, air seal and close the walls
Once the rough-in work is complete and required inspections have passed, the walls and ceilings can be finished.
Depending on the project, this may include:
Installing insulation in walls, floors or ceilings.
Air sealing gaps and penetrations.
Completing specified moisture-control and ventilation details.
Hanging drywall.
Applying joint compound and tape.
Sanding and preparing surfaces.
Applying appropriate primer.
The required insulation levels and construction methods depend on your climate zone and locally adopted building code.
Moisture control matters because an insulation or vapor-control detail suitable for one climate may not be suitable for another.
The Northeast, Gulf Coast, Southwest and Pacific Northwest do not all have identical building conditions.
Ask your contractor to follow the applicable local code and a design suitable for your climate.
Let materials dry properly
New drywall compound, concrete, self-leveling products and other wet materials require suitable drying or curing conditions.
Don't install moisture-sensitive flooring or final finishes before the substrate meets the manufacturer's requirements.
Rushing can cause peeling paint, failed adhesives, mold or warped floors.
10. Install cabinets, bathrooms and permanent fixtures
Once the walls are ready, the visible parts of the renovation start taking shape.
This stage may include kitchen cabinets, bathroom tile, showers, countertops, interior doors and other permanent fixtures.
The exact sequence depends on the materials.
For kitchens, check the final dimensions before ordering or installing fitted cabinets and countertops.
Confirm appliance clearances, electrical connections, plumbing locations and finished floor heights.
For bathrooms, pay close attention to waterproofing.
Tile and grout alone are not a complete waterproofing system for areas that require one.
A properly specified shower or wet-area waterproofing assembly must be installed and, where required, tested before the final fixtures are put into use.
Electrical and plumbing contractors may return during this stage to install outlets, switches, faucets and final connections. This is commonly called the finish or trim-out phase.
The contractor should coordinate those jobs with the cabinet, tile and flooring installers.
11. Install flooring at the correct stage
Flooring is expensive to damage and difficult to protect during heavy construction.
In many renovations, the final floor covering is installed after major demolition, rough-in work, drywall finishing and other messy jobs.
But not every type of flooring follows the same order.
Tile, solid hardwood, engineered wood, laminate and luxury vinyl plank have different installation requirements.
Before installation:
Check that the subfloor is structurally sound.
Repair uneven or damaged areas.
Complete required moisture testing.
Follow the manufacturer's acclimation and installation instructions.
Confirm appropriate expansion gaps and transitions.
Protect completed floors from remaining work.
Some flooring systems are installed before cabinets. Others, especially certain floating floors, should not be trapped underneath fixed cabinetry.
Don't assume the same installation sequence works for every product.
If you're refinishing existing hardwood floors, coordinate sanding and finishing with the painters and trim installers to limit dust and damage.
12. Paint, decorate and complete the finishing work
Painting is one of the first improvements homeowners imagine, but it's usually one of the last jobs worth finishing.
A freshly painted wall can easily be damaged by cabinet installation, electrical work or moving large appliances.
Once the disruptive work is complete, finish the details:
Repair small wall and trim imperfections.
Apply primer and final paint coats.
Install or finish baseboards and door trim.
Fit cabinet hardware and remaining accessories.
Install outlet and switch cover plates.
Complete final caulking where appropriate.
Install window treatments and decorative fixtures.
Clean the home thoroughly.
Some painters complete an initial coat before cabinetry, flooring or trim installation, then return for final touch-ups.
That can work well if the trades coordinate the schedule.
Keep leftover paint, spare tiles and extra flooring material for future repairs.
13. Complete final inspections before calling the job finished
A renovation isn't finished just because it looks finished.
Before making the final payment, check that the agreed work has been completed and required inspections have passed.
Depending on the scope, inspect and test:
Lights, outlets and switches.
Faucets, toilets, drains and showers.
Heating, cooling and ventilation.
Doors, windows and locks.
Cabinet doors and drawers.
Flooring transitions and visible finishes.
Smoke and carbon monoxide alarms.
Any new equipment or appliances.
Create a written punch list of incomplete or defective work.
Take photographs and agree on when the contractor will fix each issue.
For permitted projects, confirm that required final inspections have been approved and any applicable final documentation has been issued.
Keep copies of permits, inspection records, contractor invoices, warranties and equipment manuals.
These records can be useful for insurance, maintenance and a future home sale.
Which renovation jobs can happen at the same time?
Doing every job separately can make a project unnecessarily slow.
Some work can overlap without creating problems.
For example, roof repairs may proceed while interior demolition takes place, provided conditions are safe and access is coordinated.
Plumbers and electricians can sometimes complete rough-in work during the same phase.
Work in different rooms may also overlap when dust, drying time and access allow it.
However, putting too many contractors into the same small space can create delays and mistakes.
The best schedule identifies which jobs depend on others and which can happen independently.
A general contractor or project manager can help coordinate these relationships on larger projects.
Should you renovate one room at a time or the whole house?
A whole-house renovation can be more efficient when major systems need replacing.
Rewiring, replacing plumbing or upgrading ductwork often affects multiple rooms. Completing these jobs together may reduce repeated demolition.
However, renovating the entire house requires more money upfront and can make it difficult to live there during construction.
Room-by-room renovation can be easier to budget for, especially when the house is structurally sound and its major systems are reliable.
The risk is completing a beautiful room only to discover that future electrical or plumbing work must pass through it.
If you plan to renovate in stages, create the whole-house plan first.
Then divide the project into manageable phases without losing sight of what comes next.
How to avoid paying for the same work twice
Consider a homeowner who spends $25,000 remodeling a kitchen, then discovers that the old plumbing needs to be replaced.
If the pipes are hidden behind the new cabinets and walls, accessing them may require dismantling parts of the finished kitchen.
The repair cost now includes work that has already been paid for.
The exact amount depends on the house, but the mistake is avoidable.
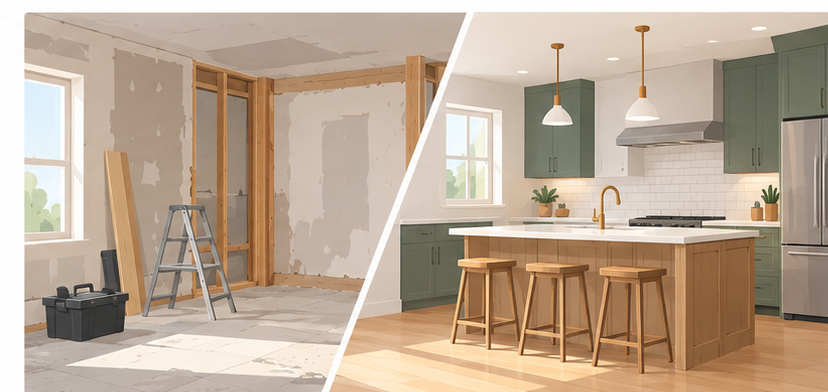
Before finishing any room, ask:
Are the pipes and electrical wiring behind these walls in good condition?
Will any future layout change require opening the room again?
Have we planned enough outlets, lighting and storage?
Should insulation or ventilation be improved while the space is accessible?
Have the necessary inspections been completed?
Can future maintenance be performed without destroying finished surfaces?
Not every possible future upgrade needs to happen immediately.
But planning for it while the walls are open can save money and disruption.
Common renovation mistakes to avoid
Painting before fixing water damage. Fresh paint won't stop a roof leak or basement moisture.
Installing flooring too early. Construction traffic, dust and moisture can damage expensive finishes.
Changing layouts after rough-in. Moving outlets, plumbing or appliances can require reopening walls.
Replacing cabinets before checking the pipes. Hidden leaks and aging plumbing can turn a simple project into an expensive repair.
Skipping permits. Unpermitted work may cause legal, insurance or resale complications.
Hiring without checking credentials. Verify required licenses, insurance and references.
Ignoring lead paint and asbestos risks. Older materials can become hazardous when disturbed.
Improving airtightness without considering ventilation. Energy efficiency and indoor air quality need to be planned together.
Ordering fitted materials too early. Measurements can change after demolition and drywall installation.
Paying the full price upfront. Use a written contract and reasonable payment milestones that comply with state law.
Using the entire contingency for upgrades. Leave money for problems discovered during construction.
Skipping the final walkthrough. Test the systems and document defects before closing out the project.
Frequently asked questions
What is the correct order to renovate a house?
Start with inspections, planning and permits. Fix structural and moisture problems, then complete necessary exterior repairs. Demolition and rough electrical, plumbing and HVAC work come before insulation and drywall. Cabinets, bathrooms, flooring, painting and final inspections follow in a coordinated sequence.
Do I need a permit to remodel my house?
It depends on your location and the work. Structural alterations and major electrical, plumbing or HVAC changes commonly require permits. Cosmetic work often doesn't. Contact your city or county building department before starting.
Should I replace windows before drywall?
Usually, if window replacement is already part of the project and will disturb the surrounding walls. Completing the replacement before final drywall finishing and painting helps avoid rework.
Should flooring go in before kitchen cabinets?
It depends on the flooring product and installation method. Some floors go underneath cabinets, while many floating floors require space to expand and should not be trapped under fixed cabinetry. Follow the manufacturer's instructions.
How much extra money should I set aside for a renovation?
A contingency of around 10 to 20 percent is a useful starting point for substantial renovations. Older homes or projects with significant unknown conditions may need more.
Can I renovate a house while living in it?
Sometimes. Small or carefully phased projects may allow you to stay. Extensive demolition, major system replacements and hazardous-material work can make temporary accommodation safer and more practical.
Can I do electrical or plumbing work myself?
Rules vary by state and locality. Some jurisdictions allow homeowners to perform specified work on their own homes with permits and inspections. Others restrict certain work to licensed professionals. Check the local rules before starting.
Is renovating an old house more expensive?
It can be, especially when the house has outdated wiring, plumbing, structural damage, moisture problems or hazardous materials. A detailed inspection and larger contingency can help manage the risk.
Should I hire a general contractor?
For a project involving structural changes and several trades, a general contractor can simplify scheduling, coordination and inspections. For limited cosmetic work, hiring individual contractors may be sufficient.
When should I make the final payment?
Follow the written contract and applicable state law. Before final payment, verify that the agreed work is complete, required inspections are approved and outstanding defects have been addressed. Where relevant, obtain lien waivers or releases and confirm subcontractor payments.
The quick renovation checklist
Inspect the house and identify structural, moisture and system problems.
Set the budget and reserve money for unexpected costs.
Create a whole-house renovation plan before starting individual rooms.
Check local permit requirements.
Verify contractor licenses, insurance and references.
Complete structural repairs and required inspections.
Fix roof leaks, drainage and moisture problems.
Plan roofing, windows, insulation and ventilation together.
Demolish safely and assess older materials for lead or asbestos risks.
Complete rough electrical, plumbing and HVAC installations.
Pass the required rough-in inspections before closing walls.
Install insulation, complete air sealing and hang drywall.
Allow wet materials and finishes to dry as required.
Install cabinets, bathrooms and permanent fixtures.
Complete finish electrical and plumbing work.
Prepare subfloors and install flooring in the appropriate sequence.
Paint, install trim and complete the remaining details.
Test systems, complete final inspections and address the punch list.
Save permits, warranties, invoices and inspection records.
Sources and further reading
Building codes, contractor licensing rules and permit requirements vary by state and local jurisdiction. Check the rules that apply to your property before starting work.
Federal Trade Commission: How to avoid a home improvement scam — hiring contractors, checking credentials and protecting payments.
US Environmental Protection Agency: Renovation, Repair and Painting Program — lead-safe renovation requirements for older homes.
US Environmental Protection Agency: Asbestos and home remodeling — precautions when disturbing potentially asbestos-containing materials.
US Department of Energy: Whole-house weatherization — planning insulation, air sealing, heating and ventilation together.
Your local city or county building department — permits, adopted building codes, inspections and final approvals.
Your state contractor licensing board or consumer protection agency — licensing requirements, contractor complaints and payment protections.
Note: This article is general information for US homeowners, not engineering, construction, legal or financial advice. Requirements vary by state, county and municipality, and the correct renovation sequence depends on the property and project. Consult qualified professionals and your local building department before undertaking structural, electrical, plumbing or other regulated work.
Keep reading

Energy upgrades that pay for themselves, ranked by payback
Which home energy upgrades actually save money? A US guide to air sealing, insulation, heat pumps, windows and solar, ranked by how fast they pay back.

First-time home buyer checklist: 12 things to do before an offer
A US first-time buyer checklist: 12 things to settle before you make an offer, from budget and credit to pre-approval, inspections and closing costs.
BuyingWhat to look for on a house viewing: a 15-minute checklist
A 15-minute viewing-day routine for US home buyers: what to check, what to ask the seller, and the red flags that staging can hide.